 Hole Fixing Tool
Time to read: ~3 min
One of the more common and useful tools is the Hole repair/fix tool. In general, it does just that, it fixes holes...
Example: Blender Monkey
The classing example of the Blender-Monkey, Suzanne is a good example on how this tool works and expected results.
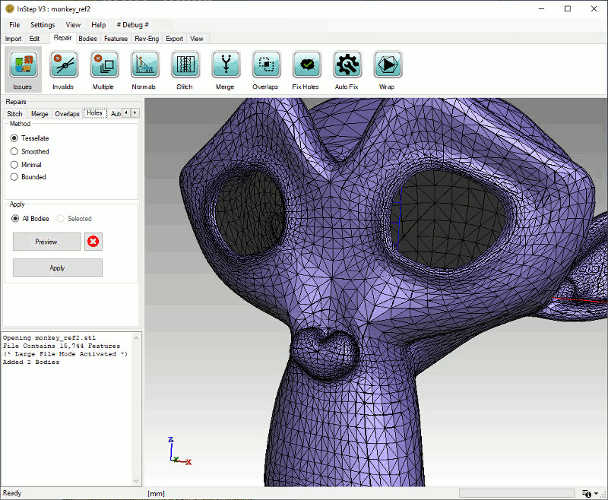 Monkey with separated eye surfaces deleted
This example file is directly obtained by using the example mesh within Blender and applying a surface subdivision step. In this case, the eyes are not connected to the
rest of the shape and can be removed using the Bodies - Split tool. The important part is that there are (two) groups of edges that are on the boundary of the surface as
can be shown using the Issues tool to highlight them.
Method: Tessellate
This hole closing method uses a modified form of the OpenGL Tessellator which is primarily used for generating triangles to represent surfaces bounded by (ordered) sets of points.
In general, this approach is robust and forms triangles within the opening without overlapping or otherwise incorrectly aligned surfaces.
Selecting this method and applying it to the above body, the following (preview) is generated:
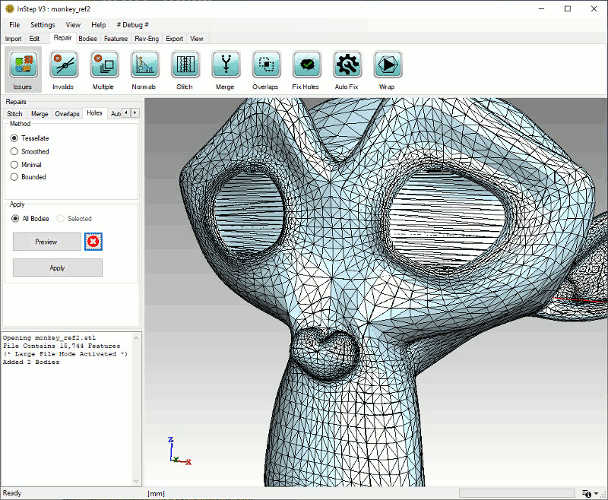 Tessellated Hole-Repair preview
In general, this provides a set of surfaces that are closed and fill in open sections. For all practical purposes, this should be a good tool to attempt hole closures as a first step.
Method: Smoothed
The Smoothed Hole repair method considers local curvature (to some extent) and attempts to generate a surface within the holes that is more continuous relative to the existing
data. A preview is shown below:
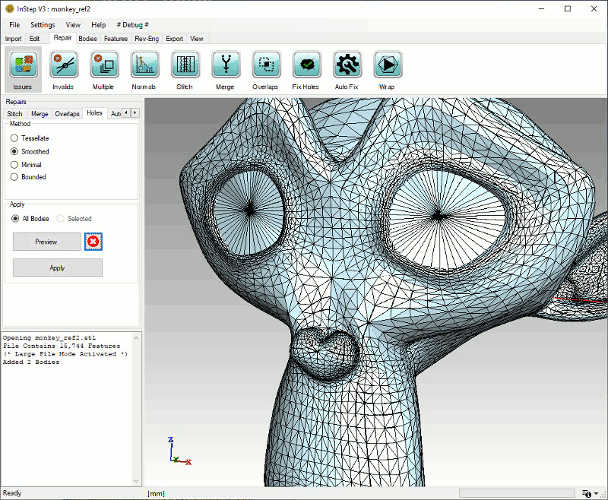 Smoothed Hole-Repair preview
The result is such that the newly formed surfaces meet at a central location which represents a good starting point for other operations. Using the preview option here is useful
as it allows for a quick preview of what is to be expected rather than making the change and to then have to re-import if it is not as expected.
Method: Minimal
The minimal method is better suited for sharp regions where a minimal-surface insertion is preferable as it (generally) recovers sharp features and edges better. In any case,
trying this option as part of the hole closure repair can be useful.
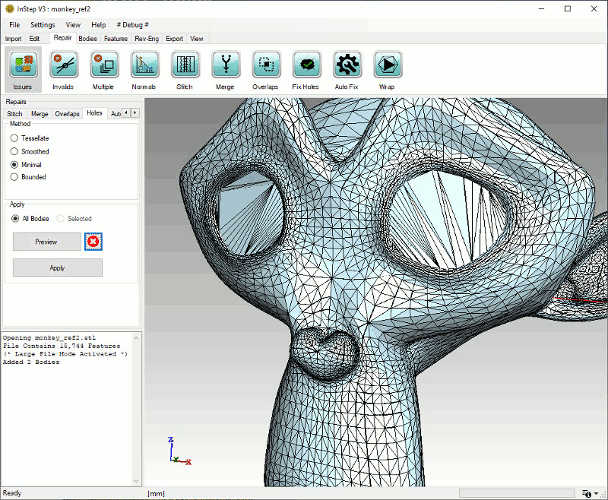 Minimal Hole-Repair preview
Unlike the other options, there is a noticeable amount of 'flatness' to some of these surfaces. If the intent is to generate NURBS surfaces (from the Rev-Eng tools)
to the resultant data, this may introduce some rough regions.
Method: Bounded
The last method is the Bounded surface approach which is different from the others in that it iteratively generates triangles from the perimeter and adds them if they
do not cause an intersection. Though this can result in slower performance for large holes, it does provide some benefit in that the way the hole is being closed is
continuously updated based on the perimeter, similar to how a stretched balloon would fill in the shape. The preview for this method is shown below:
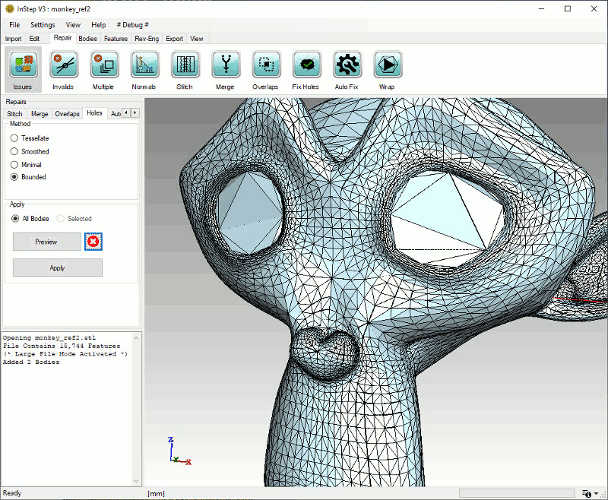 Bounded Hole-Repair preview
Based on how this method works, it will usually result in fine faces around the perimeter where the open edges are located and then gradually increase in size as the
hole closes towards the center. If a more uniform result is desirable, the mesh can always be refined from the Bodies > Remesh option.
Option: All, Selected, Preview, Clear & Apply
The process can be applied to All currently loaded data or only those selected (if multiple are detected). The Preview and Apply
generate copies of the data before making changes with the Preview option temporarily pausing between making the changes permanent.
Clearing the Data resets the view to the currently loaded data.