 Polygons: Stitch/Sew Surfaces
Time to read: ~3 min
The Surface Stitch (herein sometimes also referred to as a 'Sew' operation) searches for closely aligned edges and vertices where one or more vertices of an adjoining
surface lies between the end points of an edge. The tool attempts to project the locations from one side onto the other an to thereby split the facets so that the
edges and vertices are mirrored between them. This allows for the surfaces to then be joined to form a complete set.
Note that clicking the button in the tool bar will only switch to the Stitch options but not apply/make any changes.
Example Scenario
Depending on the application that generated the original data, it is possible that the facets (triangles) on different surfaces are not correctly aligned:
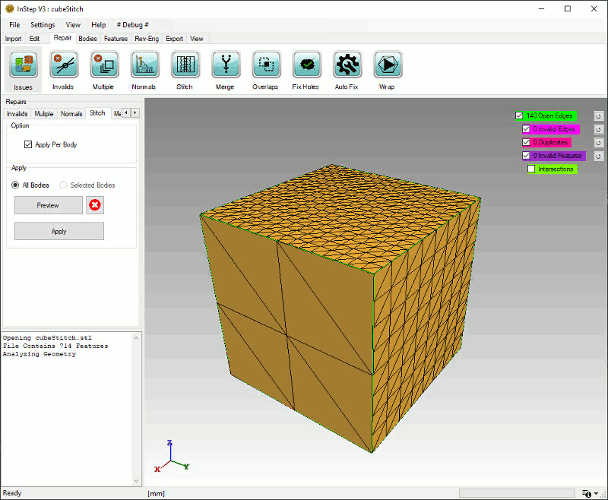 Body with faces that are not aligned
Issue with this body
The problem with this kind of data is that the data does not continuously define a surface. Each of the edges that are highlighted by the Issues tool has only
one facet attached and therefore it is not possible to determine how two facets are to be represented at the edge boundary. This can lead to a number of other
problems during the conversion and is a major issue that must be corrected. By default, the application will check for surfaces that are not continuous and
will report that multiple bodies have been found. Splitting the data can be the correct option, but this case needs to be considered by the user.
Option: Apply Per Body
The Apply per Body option determines whether each body (if there are multiple) shall be considered in turn or whether the data has already been split into separate bodies
and edge alignment should be attempted across different bodies. During import, if the default options are kept, the application will check for and report if there are surfaces
that, when grouped, represent discontinuous groups. If the data is automatically (or manually) split into separate items, then turning on this option will try to overlap and
repair bodies that are ungrouped. If this option is turned on, then it will internally search for edges that are marked as Open and for each of them attempt to sew the data
using near-by edges that are also marked as open.
Option: All Bodies / Selected
If multiple bodies are present, it is possible to apply this tool only to those that have been selected in the viewer (and are currently highlighted).
Option: Preview, Clear & Apply
These tools allow the changes to be pre-viewed without making changes to the underlying data. This can be beneficial in order to try different options if the steps
are perhaps not quite clear or for similar reasons. The general approach is to Preview, make changes then Apply. If the intent is clear, the preview step can be skipped
by directly using Apply. If the preview did not yield the desired outcome and a different tool is being used, it can be useful to re-draw the original data by clearing the
preview data. Note: once the changes have been applied, it is not possible to undo the changes without re-loading the file.
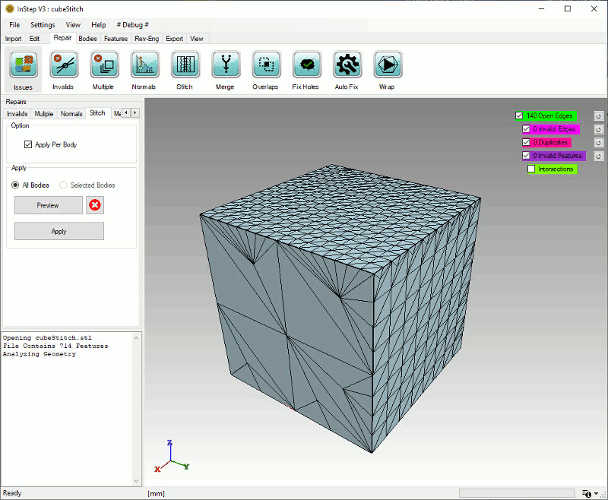 Preview showing repaired surfaces